Ingredients
– Adobe® InDesign® CS or higher (the APIDToolAssistant plug-in is available for InDesign CS, CS2, CS3, CS4, Mac and Windows).
– A licensed copy or a demo version of APIDToolAssistant 1.0.46 or higher. It also works with unlicensed versions, but then the word ‘DEMO’ will be prefixed to or superimposed on all page adornments. Download it from from https://www.rorohiko.com/downloads/APIDToolAssistant.1.0.46.zip
More info about APIDToolAssistant can be found at https://www.rorohiko.com/apidtoolassistant.html. Essentially, it’ll cost you US$25 to unlock the potential of APIDToolAssistant.
– One or more PNG files if you want graphical adornments. Higher-resolution PNG files will result in ‘smoother’ adornments when the InDesign layout window is zoomed in.
What’s cookin’
You can use the adornment features of APIDToolAssistant from ExtendScript, VBScript and AppleScript, and it works with InDesign CS, CS2, CS3 and CS4.
To show how it works, we have to ‘pick’ one environment – I’ve picked InDesign CS3 with ExtendScript on Mac. Below, I’ll be using Macintosh screen captures, but the exact same procedure also works on Windows.
So, in this recipe, we’ll build an InDesign CS3 ExtendScript script that will ‘mark’ any page items that meet certain criteria. You should be able to easily write similar scripts in VBScript or AppleScript, or adjust the scripts for InDesign CS, CS2 or CS4 if you’re so inclined – APIDToolAssistant’s adornments are equally usable from VBScript or AppleScript.
As an example, we want to find and visually mark all page items that are either too tall or too thin to our liking. Additionally, we would like to see the word count for each individual text frame.
Of course, the resulting script can easily be adjusted to work with different selection criteria – feel free to grab the script and transmogrify it into something else.
If you simply want to see the script, you can scroll down to the end.
How to do it
A PNG file
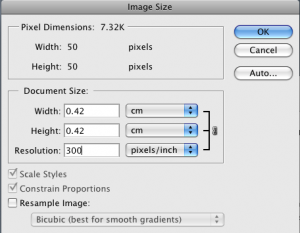
First we need a PNG file to mark the items with. In this sample, I went into Photoshop and created the following marker with transparent background, and saved it out as a PNG file:
The image has the following dimensions:
It’s 300 dpi – which means that it’ll be fairly small when the InDesign layout is displayed at 100%.
We must save the PNG file somewhere below the InDesign application folder, and use a globally unique name – i.e. a filename that is nearly certain to not exist anywhere else on the computer.
Because domain names are officially registered, the easiest way to create a unique filename is to reverse the order of the parts of your or your company official domain, and then tag on some more elements separated by periods.
For the sake of argument, I’ll be using
com.rorohiko.apid.cookbook.demomarker1.png
as the file name. rorohiko.com is our official domain name, so I can be fairly certain no-one else in the world will create any file name like com.rorohiko.yadiyadi…
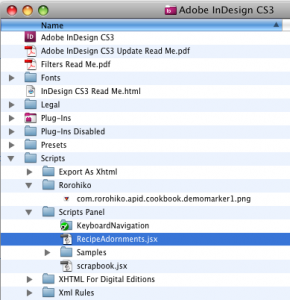
Here you can see where I’ve copied the file – I made a folder called Rorohiko underneath the Scripts folder. It does not really matter much where you copy the file – it can be stored anywhere ‘below’ the InDesign application folder – but storing it inside this folder keeps things neat and tidy.
Feel free to make different choices – as long as you abide by the basic rules (a PNG file with a globally unique file name, stored somewhere in a subfolder of the InDesign application folder), you should be fine.
The APIDToolAssistant
Next, you need to install a copy of APIDToolAssistant version 1.0.46 or higher.
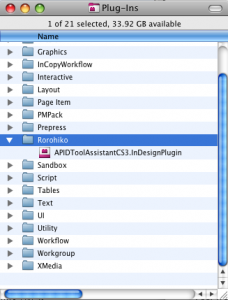
Store the plug-in anywhere below the InDesign Plug-Ins folder.
Again, to keep things tidy, I’ve created a Rorohiko subfolder in the plug-ins folder, and plunked the correct plug-in file into it.
The script – experimenting
We’ll be building the script interactively. That will allow us to show some of the available features along the way.
Use your favorite text editor to create a new, empty text file called RecipeAdornments.jsx inside the Scripts Panel folder inside the Scripts folder inside the InDesign application folder.
Launch InDesign CS3, create a new document, and create a frame on the first page. Make the Scripts Panel visible (in InDesign CS3, it’s under Window – Automation – Scripts). Your RecipeAdornments.jsx file should be visible under the Application script group.
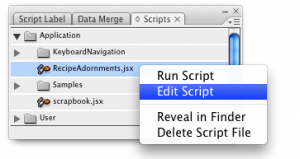
We’ll first create a quick-and-dirty bit of play-code. Context-click the RecipeAdornments.jsx and select Edit Script.
In most cases, that will open the (still empty) file in the ExtendScript Toolkit 2.
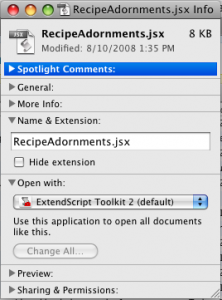
If it does not, you might need to switch to the Finder, right-click RecipeAdornments.jsx, and do a Get Info…. Then tell the Finder that .jsx files should all be opened with the ExtendScript Toolkit 2.
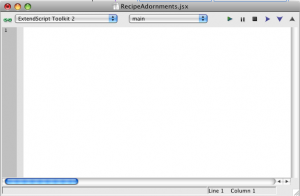
If all is well, ExtendScript Toolkit 2 will come up and show our empty script file.
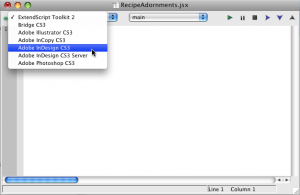
We need to tell ExtendScript Toolkit 2 that we’re talking to InDesign – change the target application in the popup menu.
Now, we type a little script. This script assumes that a single page item is currently selected.
var theItem = app.selection[0];
theItem.setDataStore("$ADORNMENT_com.rorohiko.apid.cookbook.showingoff$","test");
This is a pretty bad script – it’s making assumptions about the state of things, and if any of these assumptions are not met, it’ll simply throw up error messages. But for now, that’s OK – we’re experimenting.
First, we get a reference to the currently selected page item in theItem and then we call one of the new events that are provided by the APIDToolAssistant plug-in – setDataStore.
The setDataStore event is a catch-all, used for all kinds of things, but in this case, we’re using it to set an adornment.
In order to let APIDToolAssistant know this is an adormnent, we use a special ‘data store key’. This key is a string between two dollar signs, which starts with $ADORNMENT
After that initial prefix, you can add any string you like – but again, like with the PNG file, that string must be globally unique. So you’d again use the ‘domain name’ trick and concoct a unique key – I’ve arbitrarily chosen
_com.rorohiko.apid.cookbook.showingoff
as the suffix.
Finally, a closing dollar sign is also added.
This way, adornments have unique identifiers, and if multiple independent software developers use APIDToolAssistant to add adornments, we can be fairly certain they won’t interfere with each other.
The second parameter to setDataStore is a string – "test".
Save the script. Careful when saving with ExtendScript Toolkit 2 – it has a bug that inserts letters ‘s’ if you try to save an unmodified script. After hitting Command-S, double-check that you’ve not inserted an unwanted letter ‘s’. If so, delete it, and re-save.
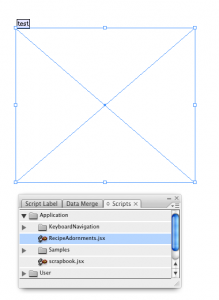
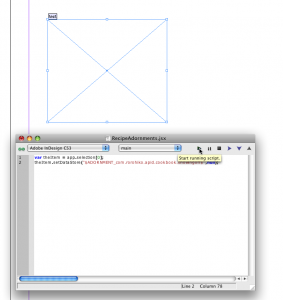
Switch back to InDesign. Make sure the frame you created is selected. Double-click the RecipeAdornments.jsx script in the scripts palette. This should be the result:
Your page item now has a tiny label attached to it. This label is not printed, but it is ‘stuck’ to the page item at all times, until you clear the adornment’s data store – to clear the label, you’d do:
var theItem = app.selection[0];
theItem.setDataStore("$ADORNMENT_com.rorohiko.apid.cookbook.showingoff$",null);
You can run the script from the ExtendScript Toolkit 2 if you want – that makes it easier to experiment. Keep the page item selected, switch to the ExtendScript Toolkit 2, adjust the script, and click the ‘run’ button.
The label should disappear.
The second parameter to the setDataStore event can be more complex – instead of passing a mere string like "test" we can also pass an array with multiple elements.
Instead of "test" we could have passed have passed an array – [ "test" ] or [ "test", null ] or [ "test", null, 1 ] – passing any of these three arrays would be functionally equivalent to passing the string.
The last sample, [ "test", null, 1 ] is of most interest – we can replace the null by a string with the name of a PNG file, and we could drop the "test" string and replace it by null.
Try that – my PNG file was called
com.rorohiko.apid.cookbook.demomarker1.png
so that’s what I’ll use.
Note: we only use the PNG file name – we don’t use any full file path names; no slashes or backslashes or colons in the name.
APIDToolAssistant will find the PNG file as long as it is somewhere ‘below’ the InDesign application folder.
var theItem = app.selection[0];
theItem.setDataStore(
  "$ADORNMENT_com.rorohiko.apid.cookbook.showingoff$",
  [null,"com.rorohiko.apid.cookbook.demomarker1.png", 1]);
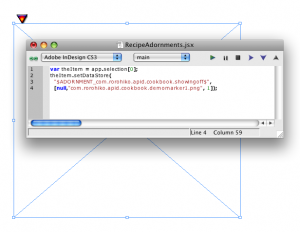
Run the script and observe the result in InDesign
The last entry in the array can be 1, 2, 3 or 4 (for top, left, right, bottom). Change the script to read:
var theItem = app.selection[0];
theItem.setDataStore(
  "$ADORNMENT_com.rorohiko.apid.cookbook.showingoff$",
  [null,"com.rorohiko.apid.cookbook.demomarker1.png", 2 ]);
and run it again – the adornment should now appear on the left side instead of on top.
The script – utility functions
To make the script more readable, we’ll introduce a few utility functions – instead of sprinkling the script code with unintelligible calls to setDataStore, we’ll instead use these functions.
We start with a clean slate – switch to InDesign and remove the page item you created earlier, and create a new one.
Select it, so our script can find it.
Then switch to ExtendScript Toolkit 2
Change the script as follows:
const kAdornmentTopKey = "$ADORNMENT_com.rorohiko.apid.cookbook.atTheTop$";
const kAdornmentLeftKey = "$ADORNMENT_com.rorohiko.apid.cookbook.atTheLeft$";
const kPNGName = "com.rorohiko.apid.cookbook.demomarker1.png";

function SetTopLabelAdornment(pageItem,label)
{
  pageItem.setDataStore(kAdornmentTopKey,label);
}

function SetLeftPNGAdornment(pageItem,pngName)
{
  pageItem.setDataStore(kAdornmentLeftKey,[ null, pngName, 2 ]);
}

var theItem = app.selection[0];
SetTopLabelAdornment(theItem,"Hello");
SetLeftPNGAdornment(theItem,kPNGName);
This script has two new functions: SetTopLabelAdornment and SetLeftPNGAdornment – the last three lines show how these functions are used.
We use two different adornment keys because we want up to two separate adornments per page item. For readability’s sake the adornment keys are defined as constants at the top of the script, and so is the name of the PNG file.
Run the script to see what it does.
The script – adding the markers
Ok, now we’ll create some real script code. This script does test its assumptions before diving into the meat of the code – it’s more robust and it will give the user some meaningful feedback in case something goes wrong.
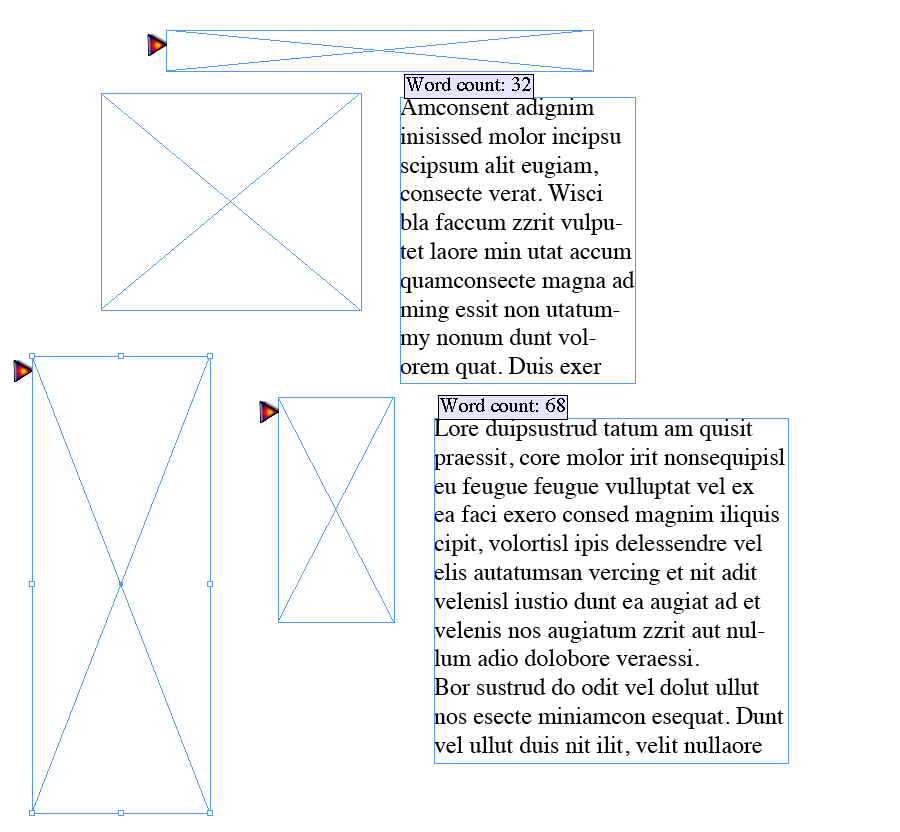
The following script will visit all page items in the document, and it will add a PNG marker adornment each time the ratio between width and height or between height and width surpasses 1.6 – i.e. any page item that is too thin or too tall to my liking.
It will also calculate the word count in every text frame it encounters, and add the word count to the top page item adornment.
const kAdornmentTopKey = "$ADORNMENT_com.rorohiko.apid.cookbook.atTheTop$";
const kAdornmentLeftKey = "$ADORNMENT_com.rorohiko.apid.cookbook.atTheLeft$";
const kPNGName = "com.rorohiko.apid.cookbook.demomarker1.png";
const kMaxWidthHeightRatio = 1.6;

// Fake loop - ends in 'while (false)' - meaning 'don't loop'. Allows us to use 'break' to bail out
// if we don't like the situation.
do
{
  if (app.documents.length == 0)
  {
    alert("No documents are open");
    break; // Bail out
  }

  var document = app.activeDocument;
  if (! (document instanceof Document))
  {
    alert("No document active");
    break;
  }

  for (var pageItemIdx = 0; pageItemIdx < document.allPageItems.length; pageItemIdx++)
  {
    var pageItem = document.allPageItems[pageItemIdx];

    SetTopLabelAdornment(pageItem,null);
    SetLeftPNGAdornment(pageItem,null);

    if (pageItem instanceof TextFrame)
    {
      SetTopLabelAdornment(pageItem,"Word count: " + pageItem.words.length);
    }

    if ("geometricBounds" in pageItem)
    {
      var width = pageItem.geometricBounds[3] - pageItem.geometricBounds[1];
      var height = pageItem.geometricBounds[2] - pageItem.geometricBounds[0];
      if
      (
        width / height > kMaxWidthHeightRatio
       ||
        height / width > kMaxWidthHeightRatio
      )
      {
        SetLeftPNGAdornment(pageItem,kPNGName);
      }
    }
    var width = pageItem
  }

}
while (false);

function SetLeftPNGAdornment(pageItem,pngName)
{
  if (pngName == null)
  {
    // Clear adornment if no PNG file name provided
    pageItem.setDataStore(kAdornmentLeftKey,null);
  }
  else
  {
    pageItem.setDataStore(kAdornmentLeftKey,[ null, pngName, 2 ]);
  }
}

function SetTopLabelAdornment(pageItem,label)
{
  pageItem.setDataStore(kAdornmentTopKey,label);
}
Neat, huh?
For additional info, check our message board:
https://www.rorohiko.com/cgi-bin/yabb2/YaBB.pl?num=1223838620
Cheers,
Kris

