What does TextStitch do?
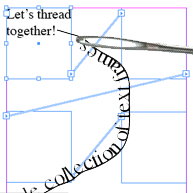
Simple answer: TextStitch automatically connects (threads) text frames together in logical order, eliminating the tedious click-click-click process of manual text threading.
Instead of manually threading dozens of text frames one by one, TextStitch does it all instantly with intelligent ordering and powerful bulk operations.
For more detailed information on TextStitch, go to:
https://www.rorohiko.com/wordpress/manuals/textstitch-manual/
Download links and installation info are further down this page.
Please Support This Free Tool
TextStitch has been free for 17 years and has saved countless hours for thousands of InDesign users.
But “free” doesn’t mean “free to maintain.” Every InDesign update requires testing and potential fixes.
Server hosting, development tools, and ongoing support all cost real money.
Your donation doesn’t cover these costs, but it tells the developer that this tool matters to you and is worth keeping alive.
If nobody donates, free tools like this disappear. Not from greed, but from the simple reality that maintaining software without any indication of value is unsustainable.
When you donate (any amount: $5, $10, $25), you’re not just saying thanks for past work, you’re voting for this tool to survive the next InDesign version update.
Every donation helps shoulder the real costs of keeping TextStitch working for everyone. Consider it an investment in your future productivity and the InDesign community’s continued access to essential workflow tools.
Stop The Threading Tedium
The old way: Threading text frames in InDesign typically means:
- Click-shift-click-shift-click through every single frame
- Manually determining order – figuring out logical flow yourself
- Time-consuming process – can take minutes for complex layouts
- Easy mistakes – wrong order, missed frames, broken flows
- Painful rework – when you need to change threading order
The new way: Select your threading method, click once, and watch TextStitch intelligently connect all your frames in logical reading order.
Three Powerful Functions
Auto-Stitch (the main event)
- Automatic threading – Connects all unthreaded frames on the spread or throughout the document
- Smart ordering – Left-to-right, top-to-bottom, page order
- Configurable behavior – Skip non-empty frames or include everything
- Data Merge superpower – Turn multiple data merge records into one flowing story
Quick-Stitch (manual control)
- Click to connect – Thread frames in the exact order you want
- Visual feedback – Selected frames turn black as you click
- Custom order – Perfect for non-standard layouts
- Story joining – Connect separate stories into one flow
Auto-Unstitch (break apart)
- Break threads safely – Disconnect frames without disturbing layout
- Visual preservation – Text stays in place, just unthreaded
- Layout protection – “Freeze” pages so text changes don’t ripple through
- Selective unthreading – Break specific connections
Perfect For These Scenarios
Data Merge Workflows
Transform Data Merge output from scattered individual frames into one flowing story:
- Run Data Merge (creates dozens of separate text frames)
- Use Auto-Stitch to thread them all together
- Delete all frames except the first
- All data now flows as one story through your layout
Complex Magazine Layouts
Threading text through multi-column, multi-page editorial layouts with sidebars, pull quotes, and irregular frame shapes.
Template Creation
Setting up template documents where text flow needs to be established across multiple pages and sections.
Document Cleanup
Reorganizing existing documents with broken or incorrectly threaded text flows.
ePub Preparation
Creating properly threaded text for digital publishing workflows.
Real-World Examples
Newsletter Data Import
You import 50 member profiles via Data Merge. InDesign creates 50 separate text frames.
Without TextStitch: Manually thread 50 frames – click first frame, shift-click second frame, shift-click third frame… (continue for 10+ minutes).
With TextStitch: Run Auto-Stitch → all 50 frames threaded instantly. Delete 49 frames → all content flows into one story for easy editing.
Magazine Redesign
Changing the threading order of a 12-frame article that flows through multiple columns and pages.
Without TextStitch: Break existing threading manually, then re-thread in new order (very error-prone and time-consuming).
With TextStitch: Use Quick-Stitch to click frames in desired new order. Done in seconds.
Layout Protection
Your 100-page annual report is approved, but client wants text changes on page 5 that could affect the entire flow.
Without TextStitch: Text changes ripple through entire document, potentially affecting all 100 pages.
With TextStitch: Use Auto-Unstitch to break threads. Text changes don’t ripple through.
Advanced Features
Intelligent Positioning
- Irregular layouts – Handles non-standard frame arrangements
- Multi-page threading – Works across spreads and entire documents
- Mixed content – Configurable to skip or include existing text
Data Merge Integration
- Bulk record processing – Transform scattered records into flowing text
- Frame break preservation – Maintains record separation with special characters
- Easy cleanup – Simple find/replace to remove break characters
Configuration Options
- Spread vs. document – Choose threading scope
- Content handling – Skip non-empty frames or thread everything
- Visual feedback – See threading progress and results
System Requirements
- InDesign 2024 or newer (for older versions, use legacy TextStitch)
- Windows or Mac
- APID ToolAssistant (free supporting plugin)
- PluginInstaller (free tool for installation and donations)
Pricing
- Completely free – Full functionality, no limitations
- Optional donations – Help keep this tool alive and support continued development and maintenance
Installation
Step 1: Download required files
- TextStitch
https://www.rorohiko.com/downloads/TextStitch.1.1.0.zip - PluginInstaller
https://PluginInstaller.com - APID ToolAssistant
Pick the correct link, depending on your computer and version of InDesign:- Mac, InDesign 2025
https://www.rorohiko.com/downloads/apid/APIDToolAssistant_Mac_2025.1.0.78.zip - Mac, InDesign 2026
https://www.rorohiko.com/downloads/apid/APIDToolAssistant_Mac_2026.1.0.78.zip - Windows, InDesign 2025
https://www.rorohiko.com/downloads/apid/APIDToolAssistant_Win_2025.1.0.78.zip - Windows, InDesign 2026
https://www.rorohiko.com/downloads/apid/APIDToolAssistant_Win_2026.1.0.78.zip
- Mac, InDesign 2025
Step 2: Install APID ToolAssistant
- Close InDesign completely
- Find your InDesign Plug-Ins folder (usually in the InDesign application folder)
- Create a Rorohiko subfolder inside Plug-Ins
- Extract APID ToolAssistant files to the Rorohiko folder
Step 3: Install TextStitch
- Extract the TextStitch download
- Copy TextStitch.spln to the same Rorohiko folder
- Restart InDesign
Below some screenshots similar to how the Rorohiko folder should look:


Step 4: Access TextStitch
- Auto-Stitch: API → Text Stitch → Auto-Stitch Current Spread (or Document)
- Quick-Stitch: API → Text Stitch → Begin Quick Stitch
- Auto-Unstitch: API → Text Stitch → Auto-Unstitch
- Configuration: API → Text Stitch → Configure…
Step 5: Donate
- Open PluginInstaller. Verify your account is unlocked.
- Use the Store window in PluginInstaller, browse the catalog and find TextStitch. Click the link in the Store window to add the bookmark into the Installing and Ordering window.
- Donate some amount
Usage Workflow
For more detailed information on TextStitch, go to:
https://www.rorohiko.com/wordpress/manuals/textstitch-manual/
Auto-Stitch basic operation
- Open document with unthreaded text frames
- Choose scope – current spread or entire document
- Select API → Text Stitch → Auto-Stitch
- Watch magic happen – frames thread in logical order instantly
Quick-Stitch custom threading
- Select API → Text Stitch → Begin Quick Stitch
- Click frames in the order you want them threaded
- Frames turn black as you select them
- Select API → Text Stitch → End Quick Stitch
- Threading complete in your custom order
Data Merge workflow
- Run InDesign Data Merge (creates multiple separate frames)
- Use Auto-Stitch to thread all frames together
- Delete all frames except first (content flows into remaining frame)
- Resize or add pages as needed for overflow text
Pro Tips
Configure before you stitch: Use the Configure dialog to set whether TextStitch should skip frames with existing content.
Test on copies: Try TextStitch on a copy of important documents first to understand how it handles your specific layouts.
Combine with Smart Text Reflow: After stitching data merge results, use InDesign’s Smart Text Reflow to automatically add pages as needed.
Use for ePub prep: TextStitch is invaluable for creating properly flowing text for digital publications.
Who Should Use TextStitch
- Data merge specialists – Anyone regularly importing data into InDesign layouts
- Newsletter/magazine designers – Complex multi-frame editorial layouts
- Template developers – Creating reusable layouts with proper text flow
- Production teams – Processing large volumes of text-heavy documents
- Digital publishers – Preparing content for ePub and other digital formats
- Anyone who regularly threads multiple text frames manually
Ready to end text threading tedium? Download the files above and consider a donation to keep this valuable tool alive!