One of our most popular tools is TextExporter. It allows you to export an InDesign file to RTF, Text or InDesign Tagged Text. You can try it out for a month for free, and after that, it’s just US$19 to activate, so it typically pays back for itself in the first hour you’re using it.
It works a treat, but when it comes to exporting a large amount of InDesign files, things get pretty boring pretty quick.
Now, for an additional US$9 it is possible to do batch exports with TextExporter. This is by means of another little tool we have – Batcher. You can try it out for free as well; it is not a time-limited demo, but instead it is ‘nagware’.
Batcher allows you to take any InDesign ExtendScript that operates on the current document, and convert it into a drag-drop batch process.
You need to do some setup, but it’s fairly straightforward.
I’ll go through a sample setup and I’ll do it fairly slowly. Feel free to skip ahead over the parts that are not useful for you.
At the end, you’ll have built a reusable tool onto which you can drag/drop multiple InDesign files, to get them all be exported in a single batch operation.
Quick Overview:
– Download and install TextExporter
– Download Batcher. Make a folder on your desktop in which you put the Batcher application, plus some ‘satellite’ objects:
* the Batcher Libs folder (this on Windows only)
* the config.ini and BatchTextExport.jsx files from the ScriptCollection/BatchTextExport folder.
– Open the copied config.ini with a text editor and adjust the path to the InDesign application so Batcher knows where to find InDesign.
– Drag/drop InDesign files or a folder with InDesign files on top of the Batcher application folder inside the folder on your desktop.
Step 1: Download and install TextExporter
Visit the web page and follow the instructions.
https://www.rorohiko.com/textexporter
In short: you’ll need to copy a number of plug-in files and folders into your InDesign Plug-Ins folder.
The quantity and the names of these files vary between platforms: Mac, Windows and every Creative Suite Version have their own specific files.
The key trick to it is to make sure you copy all of the required items. If you leave one or the other out, it won’t work.
A second possible ‘gotcha’ is that TextExporter does not activate immediately after you launch InDesign. It only activates after you open or create a document.
As an example, I’ll step through an installation on Windows with InDesign CC. Other installations are similar, but the quantity of files, and the file names will be different.
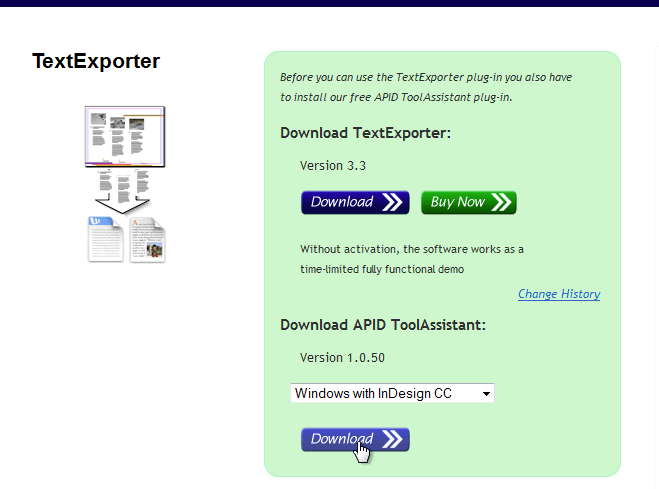
Step 1.1: Download TextExporter

Go through the motions. Eventually you should end up with a downloaded .zip file somewhere on your hard disk. Let the .zip file sit for now.
Step 1.2: Download APID ToolAssistant. On the same TextExporter web page, select your configuration by clicking the Select configuration popup menu.
I am on Windows + InDesign CC:
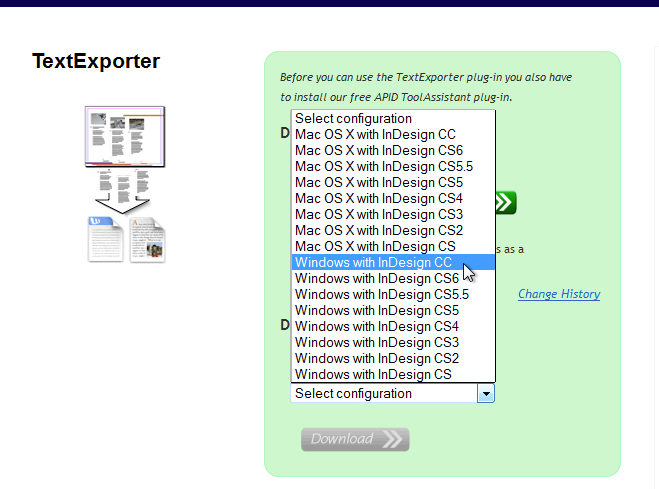
Step 1.3: Once you’ve selected the correct configuration, download the APID ToolAssistant plug-in.
 Again go through the motions…
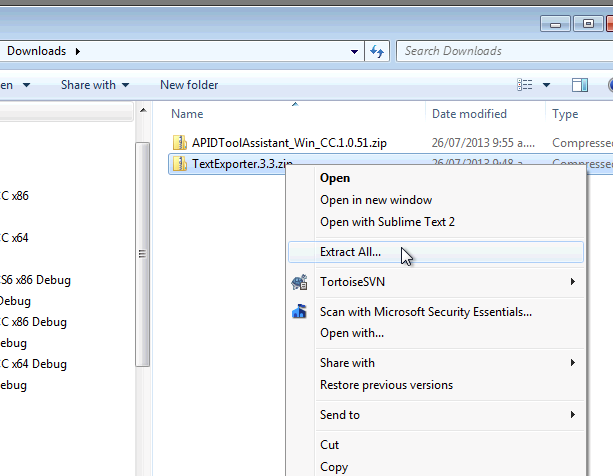
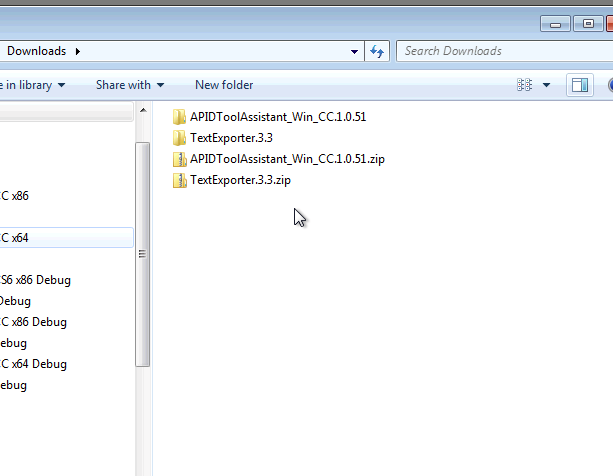
Step 1.4: Decompress both downloaded .zip files. I am using the built-in Windows unzipping functions, but of course, you can use whatever tool you prefer. On Mac you can normally double-click the .zip files to make them decompress.
After decompressing both .zip files:
Step 1.5: Make sure InDesign is not running, and then go find your InDesign Plug-Ins folder. I am using the 64-bit version of InDesign CC, so in my case it is in
C:\Program Files\Adobe\Adobe InDesign CC (64 bit)\Plug-Ins
InDesign CC on 64-bit Windows is somewhat tricky, because both 32-bit and 64-bit versions have been installed, and it’s easy to get confused and launch the wrong version, or install stuff in the wrong version.
On 64-bit Windows, the 64-bit version is shown in the start menu as Adobe InDesign CC (64 bit), and it installed ‘below’ C:\Program Files, whereas the 32-bit version is shown as Adobe InDesign CC and it is installed below C:\Program Files (x86).
Confusing? Yep.
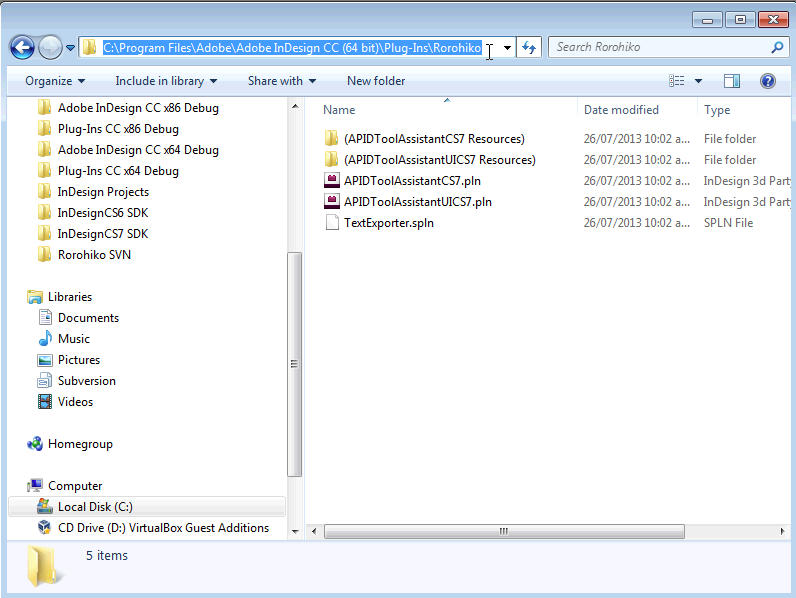
In short: on 64-bit Windows, you should use start menu item Adobe InDesign CC (64 bit) and you want to install 64-bit versions into C:\Program Files\Adobe\Adobe InDesign CC (64 bit)\Plug-Ins
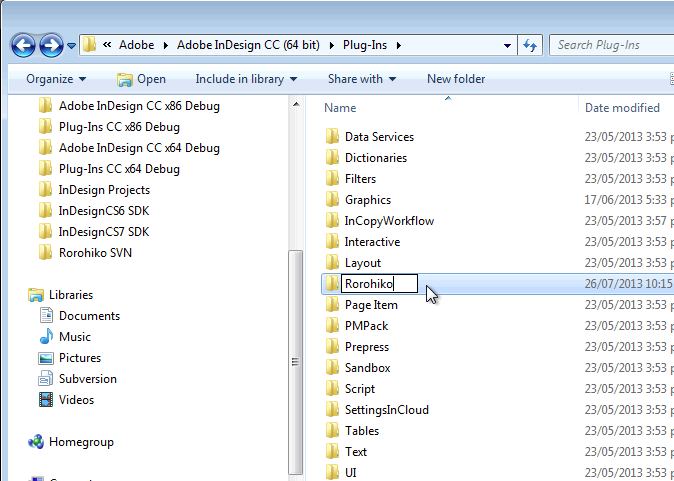
To keep things tidy, I’ll create a subfolder called Rorohiko inside the Plug-Ins folder.
That allows me to keep the plug-ins I am about to install separated from the stuff that’s already there.
You don’t need to do create this extra subfolder, but it is recommended that you do.

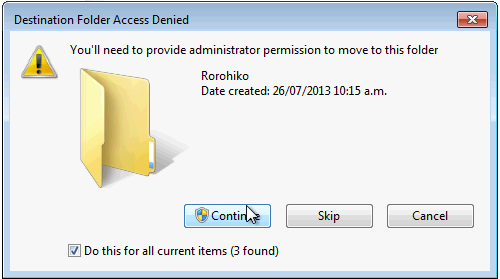
Because this is inside a system folder, I need to confirm.

This also means that you have to have the proper system privileges to be a system administrator on your computer.
If you’re on a corporate workstation that is managed by the I.T. department, you might be unable to do this, and if that’s the case, you’ll need to ask your I.T. department for assistance.
Once the folder is created, I rename it Rorohiko
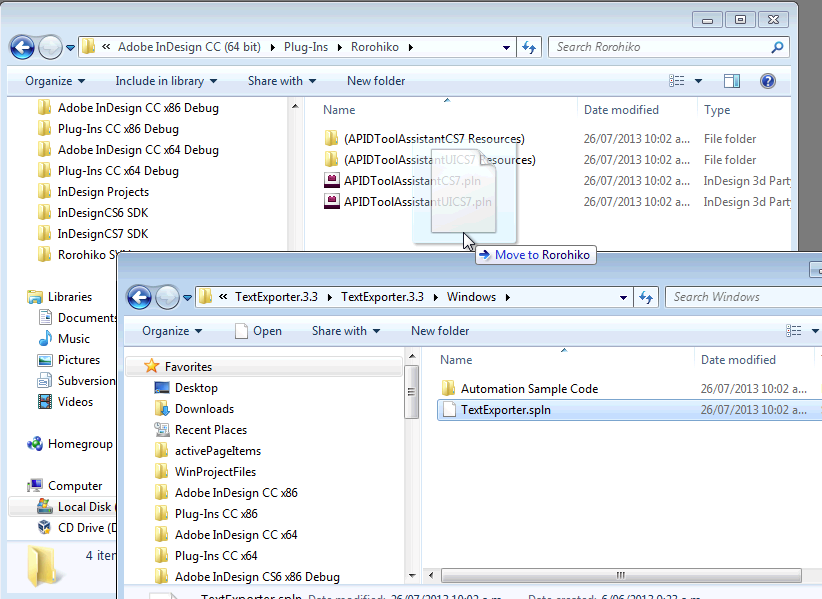
Step 1.6: Copy or move the necessary items into the Rorohiko folder below the Plug-Ins folder.
In the case of APID ToolAssistant for Windows + InDesign CC, there are four items to install (two folders, two plugin files).
I make sure I copy the correct ones: the .zip file contains both 32-bit and 64-bit plug-ins.
As I am using 64-bit InDesign CC, I’ll use the 64 bit versions from the APIDToolAssistant_Win_CC.1.0.51\64bit folder.
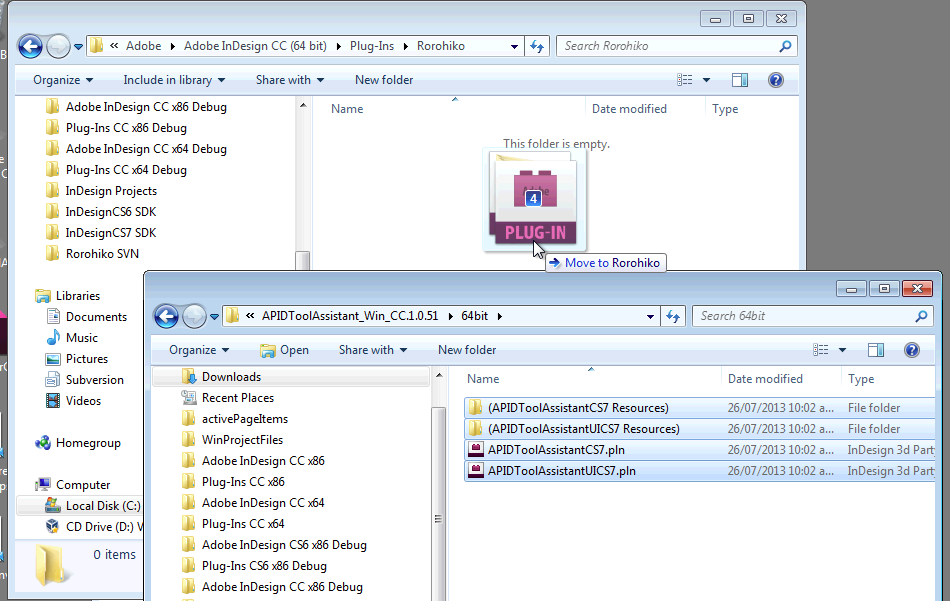
This move needs to be confirmed as well.
And rinse, repeat, for TextExporter.spln.
Don’t copy across the Automation Sample Code. Those are sample scripts, and don’t need to be in the Plug-Ins folder.
Again, confirm the operation. That completes the TextExporter installation.
If you want to uninstall these items later on, simply reverse the steps of the installation.
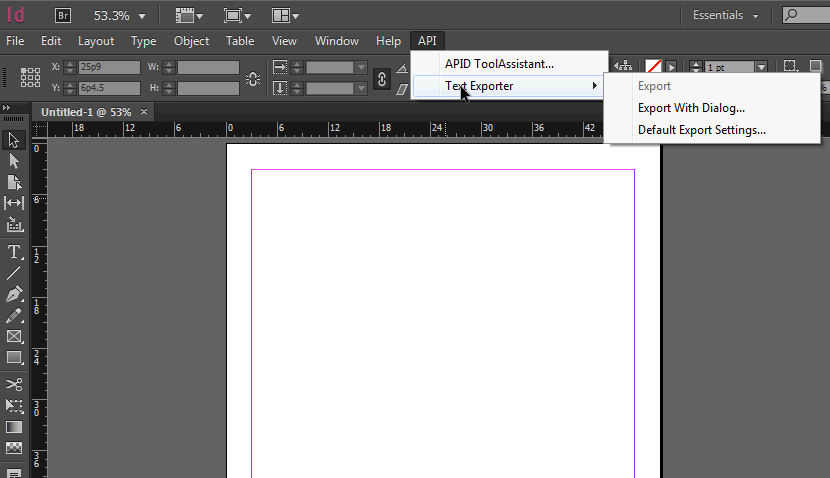
Step 1.7: Test by launching InDesign and creating a new document.
After you’ve created a new document, the API menu should be visible, and contain an entry for TextExporter.
On Windows with InDesign CC make sure to launch the proper copy of InDesign CC.
If you’ve installed into 64-bit InDesign CC, make sure you don’t accidentally launch the 32-bit version – make sure to launch Adobe InDesign CC (64 bit) from the start menu.
 Step 2: Install Batcher
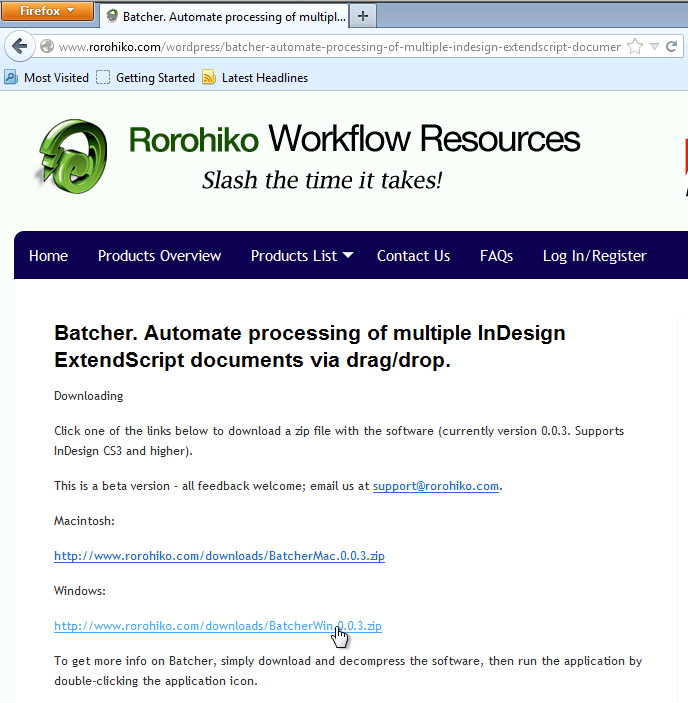
Step 2.1: Download Batcher.
https://www.rorohiko.com/batcher
Pick the correct version on the web page. I’ll pick the Windows version.
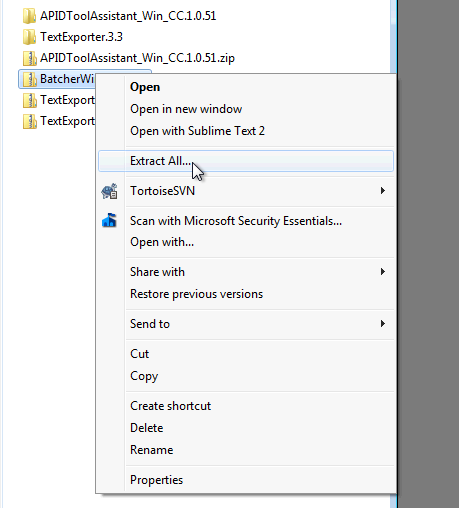
 Step 2.2: Decompress the downloaded .zip file.
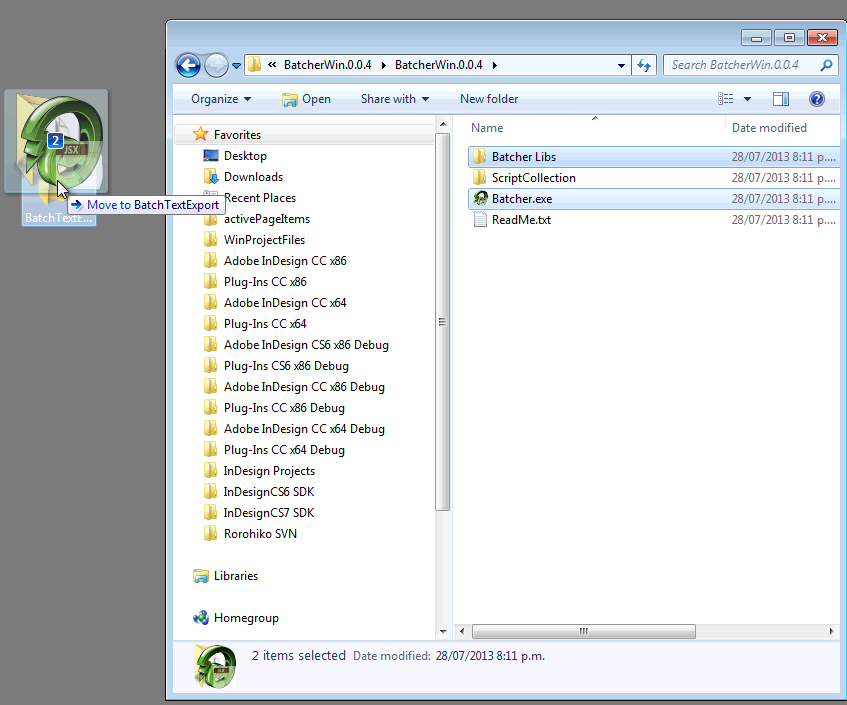
Step 2.3: Create a tool container.
Create a folder called BatchTextExporter in a convenient location. Creating it on the desktop is fine.
Move the file Batcher.exe and the folder Batcher Libs into the BatchTextExporter folder.
If you’re on a Mac there is only the Batcher.app to be moved or copied, as the Mac version does not have a Batcher Libs folder.
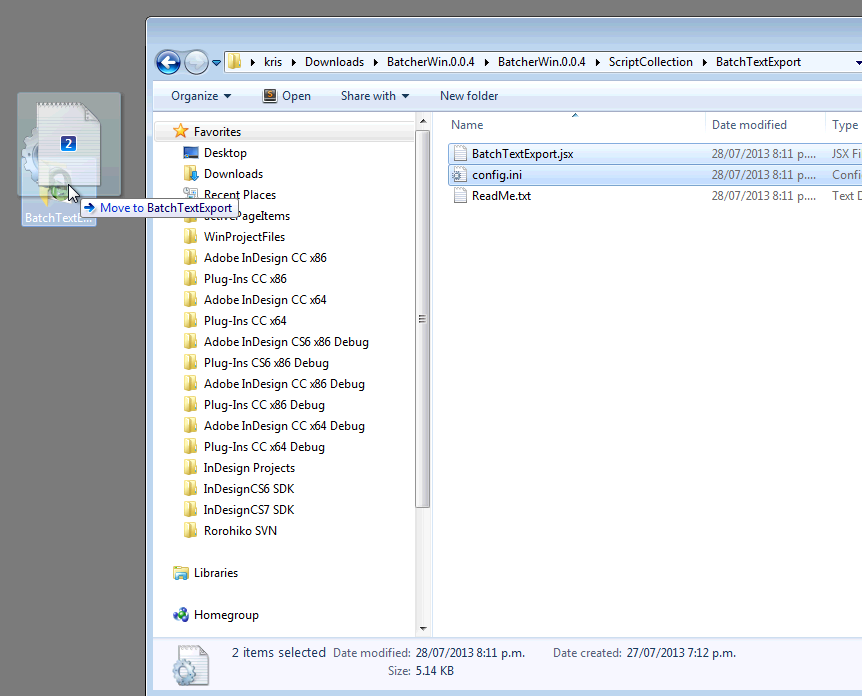
Step 2.4: Copy the necessary script and config file.
Inside the Batcher download, you’ll find a folder called ScriptCollection. Inside that folder there’s another folder called BatchTextExporter, which contains two files, BatchTextExport.jsx and config.ini.
These two files also need to be copied or moved to the BatchTextExporter folder on your desktop.
Step 2.5: Find the path to your InDesign application.
We will need to tell Batcher where it can find InDesign, and provide it with the full path to your InDesign application. If you have multiple versions of InDesign installed, you can tell Batcher exactly which version you want to use.
You’ll need to find the correct path to your InDesign application file. It would be something like
/Applications/Adobe InDesign CC/Adobe InDesign CC.app
on Mac, or on Windows, something like:
C:\Program Files\Adobe\Adobe InDesign CC (64 bit)\Plug-Ins
The actual path will vary depending on the version of the Creative Suite, and your computer platform.
You need to determine the path for your installation. Don’t blindly copy the one I am using in my sample run through.
If you have trouble figuring out the correct path, our free drag-and-drop ShowPaths tool can help:
https://www.rorohiko.com/showpaths
Step 2.6: Configure Batcher.
Open the config.ini file inside the BatchTextExport folder with a text editor of your choice.
The built-in Notepad on Windows will work fine. On Mac you can use the built-in TextEdit, or the free TextWrangler, which can be downloaded from:
http://www.barebones.com/products/textwrangler/
The config.ini is commented and should be fairly self-explanatory. The only change you need to make is to adjust the file path to InDesign.
Scroll all the way down, and adjust the file.
Mac example: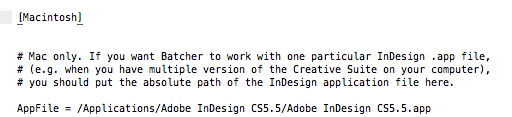
Windows example:
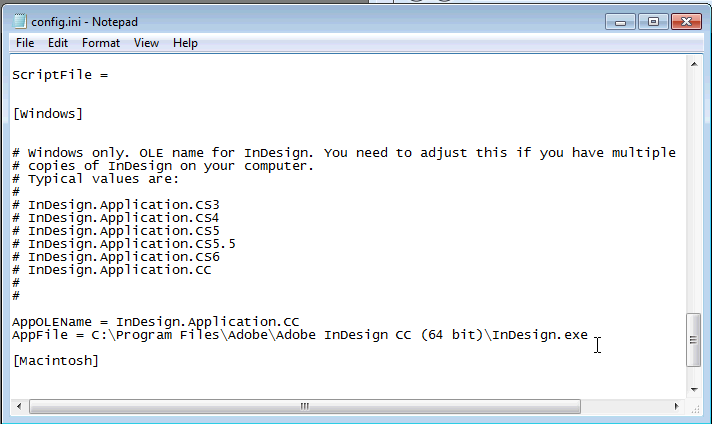
On Windows, you need to provide the path as well as the OLE name of InDesign (one of the options shown). For InDesign CC, the OLE name is InDesign.Application.CC.
Close and Save.
Step 3: Convert files
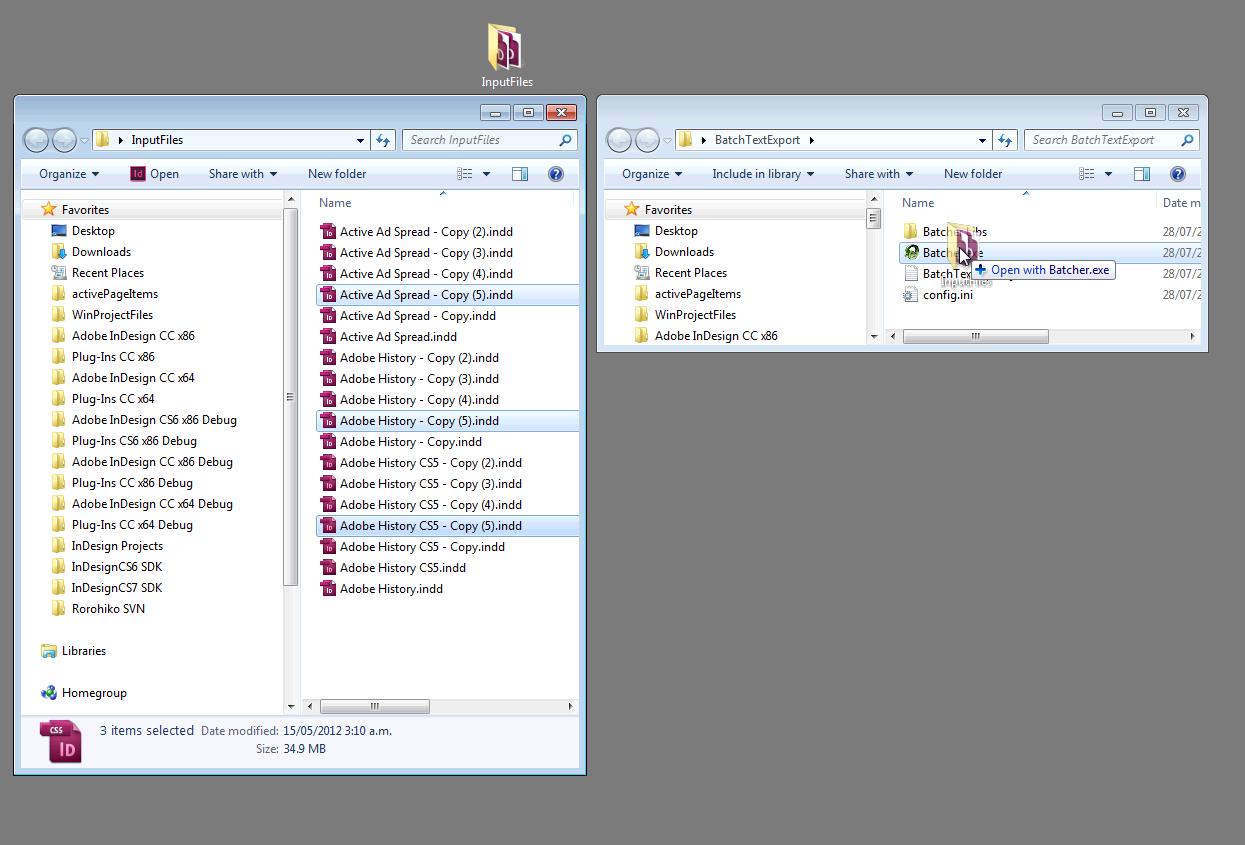
We’re done. You can now drag-drop either
– one or more InDesign files
– a folder filled with InDesign files
– an .indb book file
onto the Batcher application icon inside the BatchTextExport folder, and they’ll all be run through a text export.
Batcher runs in two phases: first, it will generate a list of batch commands for InDesign to execute. It will then tell InDesign to run the list of batch commands. Batcher itself will then quit, while InDesign will dutifully start executing the batched commands – you’ll notice that InDesign will remain busy for quite some time after Batcher quits.
The included script is set up so it does not inadvertently upgrade existing files.
For example, if your batch contains some CS4 documents and you’re using this tool to do a batch export using InDesign CC, the CS4 documents would not be silently upgraded to InDesign CC. They’d remain in CS4 format.